Member-only story
Create a simple web user interface on Node-RED using the Dashboard plugin
You manage to install the Node-RED and now you can start to create your next app from head to toe by learning how to use the “node-red-dashboard” plugin so you can control everything you want from the frontend.
Install the necessary plugin in Node-RED
1. Navigate to the Node-RED web interface by accessing your Raspberry IP and append :1880, e.g. http://192.168.0.156:1880 or http://raspberrypi.local:1880/ like here.
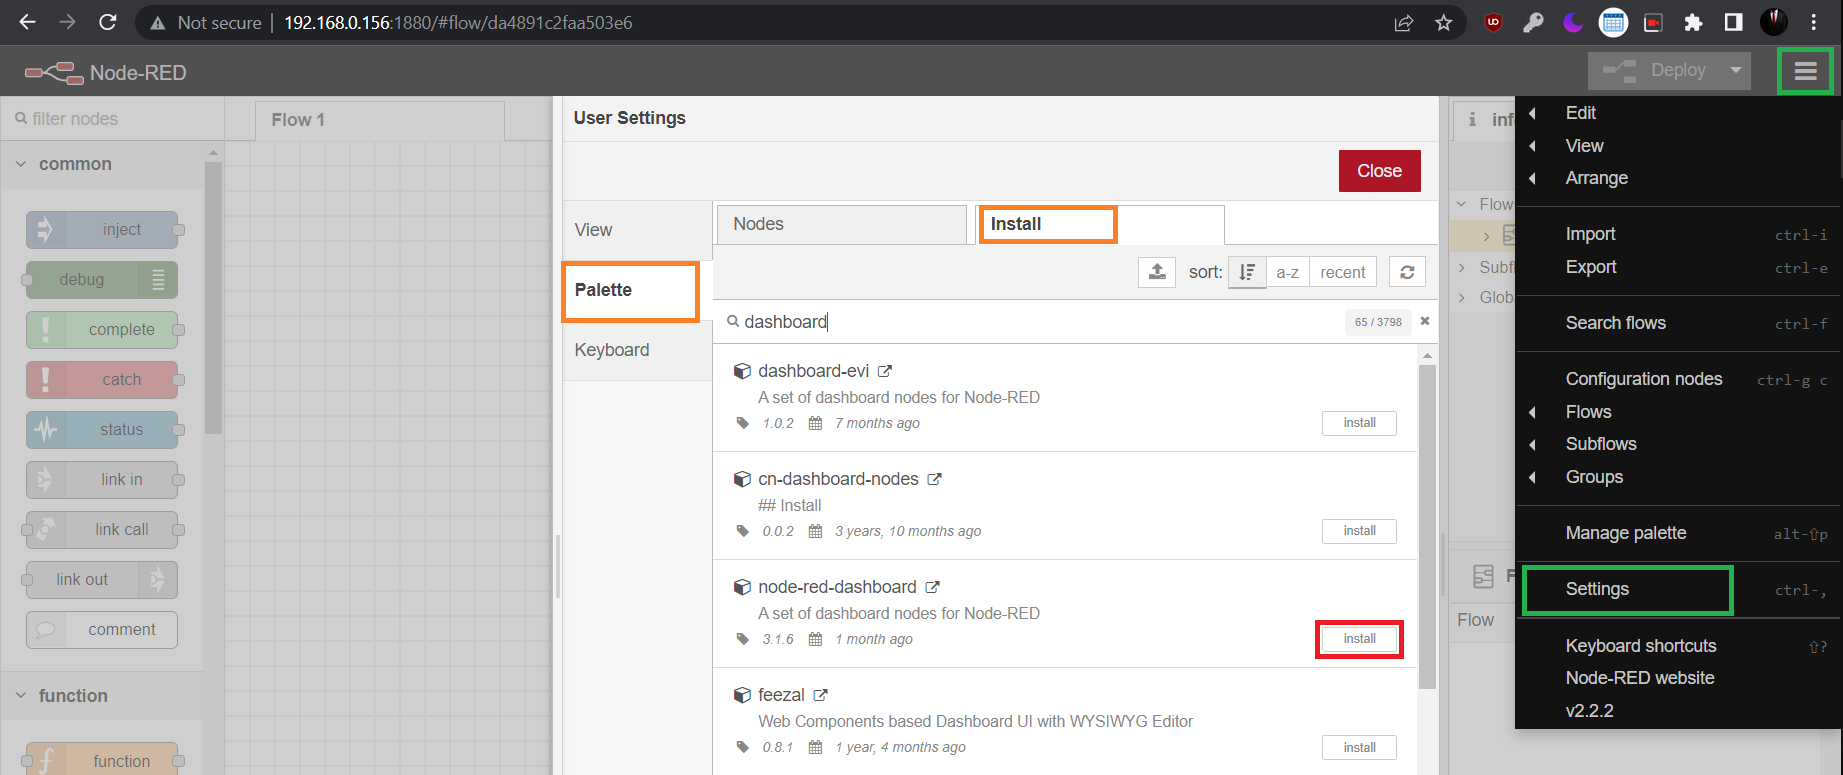
2. Install the “node-red-dashboard” plugin by navigating to the 🟩 green box “Settings” then to 🟧 orange box “Pallete” and “Install” tab and press 🟥 red box “Install” at the right of the plugin then press “Install” again in the pop-up.


Now you got the plugin installed you should see it in the list of nodes at the left of the panel like in the 🟨 yellow box.
Create a simple interface in Node-RED
Let’s create our first interface and explain what happens:
- Drag and drop nodes from the left 🟨 yellow box and then connect them as in the image below:
